
Funny video on HuffPost, showing two worm bins side by side and giving a little critique of the differences.
I gleaned some good advice -- looks like I'm putting too much food in. You shouldn't put food in the next highest level until it's all eaten in the current working level, but I've got food to spare and it's in the higher levels. What this means is that the food will sit around longer and get a little grosser before the worms are ready to come up and eat it.
What this also means is that I either need more worms... or another bin. Who's going to tell Pete?
Showing posts with label worms. Show all posts
Showing posts with label worms. Show all posts
02 March 2009


25 February 2009
Temperature
Got a question about location and temperature from a friend. She wants a worm bin; her husband/significant other most emphatically does not want a worm bin; she's decided to get a worm bin anyway. (Ah, this feels familiar.)
The question is: where to hide it? I suggested her huge pantry, envying that she has one (I don't). Apparently, the husband/worm deny-er goes in there too -- who knew? So she's thinking laundry room, which is in her basement.
My bin is in my laundry room, which is in my basement, but we've got different situations. My basement is an English walk-out, meaning it's only a bit underground, part of a split-level house, and the laundry room has the boiler, which keeps things mostly toasty.
Her house is a regular 2-story house with a deep basement that gets chilly. She's not sure exactly -- but possibly around 50-60 degrees. Time to head to The Book.
The Book = Worms Eat My Garbage by Mary Appelhof. She's the Worm Woman extraordinaire who first wrote her book in 1982 and has since been offering succor and support to budding vermiculturists around the world. Pretty much everything you need to know to get started is in The Book.
Back to The Book: Mary writes in The Book that redworms will live most comfortably -- and eat most rapidly -- in temps between 59-77 degrees F, although they can handle as low as 50 degrees F. Good news for my friend!
Mary also points out that temps above 85 degrees F may fry the worms. OK, she doesn't say fry, but the visual image scared you off testing the higher limit, right? Don't fry worms. No one will want to come to your house.

If you're not sure what the temp is in a particular location, you can buy a little doohickey from the hardware store. This one has a little sensor, a digital readout in either F or C degrees, and other options that I've never explored. It's pretty accurate, within a few degrees. (For example, I don't keep my house in the winter at 71. Really, I don't. I keep it at 67 during the day when I'm the only one here. The reason that the doohickey is showing a slightly higher temp may be due to the fact that I've got a fire roaring in the living room. Or it's just a few degrees off. Whatever you want to believe.)
The question is: where to hide it? I suggested her huge pantry, envying that she has one (I don't). Apparently, the husband/worm deny-er goes in there too -- who knew? So she's thinking laundry room, which is in her basement.
My bin is in my laundry room, which is in my basement, but we've got different situations. My basement is an English walk-out, meaning it's only a bit underground, part of a split-level house, and the laundry room has the boiler, which keeps things mostly toasty.
Her house is a regular 2-story house with a deep basement that gets chilly. She's not sure exactly -- but possibly around 50-60 degrees. Time to head to The Book.
The Book = Worms Eat My Garbage by Mary Appelhof. She's the Worm Woman extraordinaire who first wrote her book in 1982 and has since been offering succor and support to budding vermiculturists around the world. Pretty much everything you need to know to get started is in The Book.
Back to The Book: Mary writes in The Book that redworms will live most comfortably -- and eat most rapidly -- in temps between 59-77 degrees F, although they can handle as low as 50 degrees F. Good news for my friend!
Mary also points out that temps above 85 degrees F may fry the worms. OK, she doesn't say fry, but the visual image scared you off testing the higher limit, right? Don't fry worms. No one will want to come to your house.

If you're not sure what the temp is in a particular location, you can buy a little doohickey from the hardware store. This one has a little sensor, a digital readout in either F or C degrees, and other options that I've never explored. It's pretty accurate, within a few degrees. (For example, I don't keep my house in the winter at 71. Really, I don't. I keep it at 67 during the day when I'm the only one here. The reason that the doohickey is showing a slightly higher temp may be due to the fact that I've got a fire roaring in the living room. Or it's just a few degrees off. Whatever you want to believe.)
20 February 2009
Ray of Hope

There is one good thing I saw when I opened the bin -- the first working tray looked luscious.
Like this.
Aside from copious amounts of peanut shells -- virtually untouched -- everything else looked like damp soil. Damp, dark soil. Darker than the coir had been; definitely darker than the bedding in which the wigglers arrived. There was no more newspaper, no cardboard packaging, no recognizable half-decomposed bits o' organic. It's lovely.
Go ahead. Click on the picture -- view it up close.
And then make a note that all peanut shells go in the outdoor bin only. They spoil the picture.
Moist
I guess if I had given it much thought, I'd've re alized how moist a vermicomposter can get. Organic waste is full of water -- vegetables and fruits contain a TON of water. But somehow I didn't think I'd put that much moisture into the bin.
Oops.
This is the base of the Can-O, and if you look closely, you can see a lot of moisture beading along the edges.
And this is a view of the base from a little further back. Yup. Those are dead worms.
Hmmmm.
It appears I neglected (or forgot or got lazy about or ignored) opening up the handy spigot to remove the excess liquid (the leachate, if you've been paying attention) to help regulate the moisture levels in the bin. And some of my faithful worms are drowned.
Dang.
Even worse, when I did put a handy Ikea container (formerly used for hairclips a nd crayons) under the spigot, I found out the worms, which seemed so round and vibrant, were now so... insubstantial... that they slid right out the spigot. Into my Ikea container that formerly held little girls' hairclips and crayons (although not usually at the same time).
Ick.
This could be a problem. Tune in tomorrow, when I discover exactly how many worms were involved in this atrocious wormicide.
 alized how moist a vermicomposter can get. Organic waste is full of water -- vegetables and fruits contain a TON of water. But somehow I didn't think I'd put that much moisture into the bin.
Oops.
This is the base of the Can-O, and if you look closely, you can see a lot of moisture beading along the edges.
And this is a view of the base from a little further back. Yup. Those are dead worms.

Hmmmm.
It appears I neglected (or forgot or got lazy about or ignored) opening up the handy spigot to remove the excess liquid (the leachate, if you've been paying attention) to help regulate the moisture levels in the bin. And some of my faithful worms are drowned.
Dang.
Even worse, when I did put a handy Ikea container (formerly used for hairclips a
 nd crayons) under the spigot, I found out the worms, which seemed so round and vibrant, were now so... insubstantial... that they slid right out the spigot. Into my Ikea container that formerly held little girls' hairclips and crayons (although not usually at the same time).
Ick.
This could be a problem. Tune in tomorrow, when I discover exactly how many worms were involved in this atrocious wormicide.
A week later (if you ignore my posting dates)
A week later, Abby and I opened up the bin.

I already noticed a few rookie mistakes -- putting all the trays on top, even though the top two were empty. I guess I'm supposed to stack them to the side until I need them.
Mold. There's mold everywhere in the working tray. Wow. Have I mentioned I'm quite allergic to mold? This stuff didn't bother me much, but I'll admit, Abby and I kept our distance.
Some things look good -- I see worms in and among the ort. Some things smell good -- as in I don't smell anything. For good measure, I had Abby add some grapefruit remai ns -- those always smell nice (words that may come back to haunt me).
Another good sign -- but first let me explain something. There's the base -- nothing goes in the base except for excess liquid that drains down to it. Then there's the first working tray with the coir bedding, the worms, and the first layer of food with newspaper covering it. At some point in the last week, (not pictured), I also added some food and a newspaper cover to the second working tray. It seemed the right thing to do -- the first working tray seemed jam-packed with wormness.
Sooooo, the following picture is of the second working tray being lifted in the ai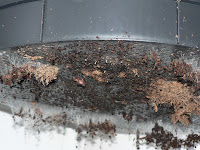 r by me while my trusty Abby takes the shot. If you look closely, you can see worms hanging through the mesh. This is a good sign! This means some worms are migrating up to the next level -- it works! (Yes, you can also see mold -- I'll have to check further on this, because it seems excessive.) But it's working! It's working!
[If you want to see the worms in all their close-up goodness, click on the pictures and they'll open up much, much bigger. It's up to you.]

I already noticed a few rookie mistakes -- putting all the trays on top, even though the top two were empty. I guess I'm supposed to stack them to the side until I need them.
Mold. There's mold everywhere in the working tray. Wow. Have I mentioned I'm quite allergic to mold? This stuff didn't bother me much, but I'll admit, Abby and I kept our distance.
Some things look good -- I see worms in and among the ort. Some things smell good -- as in I don't smell anything. For good measure, I had Abby add some grapefruit remai
 ns -- those always smell nice (words that may come back to haunt me).
Another good sign -- but first let me explain something. There's the base -- nothing goes in the base except for excess liquid that drains down to it. Then there's the first working tray with the coir bedding, the worms, and the first layer of food with newspaper covering it. At some point in the last week, (not pictured), I also added some food and a newspaper cover to the second working tray. It seemed the right thing to do -- the first working tray seemed jam-packed with wormness.
Sooooo, the following picture is of the second working tray being lifted in the ai
 r by me while my trusty Abby takes the shot. If you look closely, you can see worms hanging through the mesh. This is a good sign! This means some worms are migrating up to the next level -- it works! (Yes, you can also see mold -- I'll have to check further on this, because it seems excessive.) But it's working! It's working!
[If you want to see the worms in all their close-up goodness, click on the pictures and they'll open up much, much bigger. It's up to you.]
19 February 2009
And so it begins

I had a bin. I had my worms. I had organic waste overflowing a fabulously aerated bin under my kitchen sink. I had a family used to collecting organic waste for outdoor composting. I had moistened bedding in the first working layer. Time to put it all together.
This picture shows the coir bedding in the bottom working tray (dark brown) with the lighter brown bedding that came with the worms, and the worms themselves (kind of pinkish -- the "red" part of the name does not seem to hold out so far).
This picture shows the bottom working tray with the wet newspaper on top.
 Underneath, I put a bin full of organic waste from the kitchen: banana peels, peanut shells, grapefruit rinds, coffee grounds & filter, egg shells, bread, shreddings from various vegetables, and possibly some fuff from the dryer. I put all of this is a thin layer right over the worms/bedding, and covered the whole mass with wet newspaper.
I'm not sure about the dryer fuff. I compost that all the time in my outdoor bin, but I don't know if worms will like it. Other things worm might like: cereal, cake, cheese*, lemon, onion peel (not the onion itself), pizza crust, potatoes, potato salad, tea bags, and all kinds of spoiled food from the refrigerator. Too much citrus could kill the worms; I'm also leery of dairy, like cheese*, for odor issues. Meat doesn't generally go in a home vermicomposter due to odor issues and also the possibility of attracting unwanted tenants (wanted tenants, I'll mention those as I find them).
For my husband and kids -- here's a list of what DOESN'T go in the bin: things that don't decompose (like rubber bands, staples, sponges or aluminum foil).
Also animal waste doesn't generally go in -- definitely not from cats and dogs. Guinea pigs, of which we have three, are a different matter. We use recycled paper nuggets for bedding for the guinea pigs, and this seems like a perfect "brown" material for the vermicompost -- and how cool to get even more use from this already recycled and peed upon material. Also, cavy (aka guinea pig) droppings are small and dry, and even when... wet... odorless. And these animals are vegetarians, which avoids the unwanted-tenants-attracted-by-meat-poop problem.
Although my favorite worm composting book, Worms Eat My Garbage, by Mary Appelhof, didn't specifically mention guinea pig droppings, I think they're ok to use. I googled "vermicomposting" and "guinea pig bedding" and generally got the thumbs up from other vermicomposting-people. I don't think I'll use it though -- I've got a bag of shredded financial documents already in line in the laundry room by the Can-O, and I'll go through that first.

Here's Tonks, cavy extraordinaire, in his (unwelcome) Christmas gift -- a harness and leash.
Bedding
Bedding for worms is thankfully not what I consider bedding. Bedding can be any shredded "brown" material like shredded newspaper or computer paper, coir, wood chips or peat moss. Just as with outdoor composting, a balance of green and brown material is necessary for proper decomposition -- also, and more importantly, a proper amount of brown material keeps the green material from getting stinky.
The Can-O-Worms comes with one block of coir, or coconut fiber. To loosen up the coir, I soaked it in a bucket full 3/4 with water. I left the paper wrapping on the block -- paper is prime food for worms. After about 15 minutes, the coir had become a brown mass of mush. I scooped up handfuls of coir, squeezed out excess water, and spread it on the cardboard packaging on the bottom of the working tray.
Different beddings have pros and cons. Shredded newspaper is easy to obtain, holds moisture well, and doesn't have an odor, but it can also become matted and thick easily. Machine-shredded computer paper is also easy to obtain but it doesn't hold moisture as well as newspaper. Coir is apparently a byproduct of the coconut industry in Sri Lanka, and the islands started exporting it as a substitute for peat moss as a way to handle disposal. However, knowing that coir has to travel long distance (I don't have the same information about my newspaper or computer paper) and seeing the cost, I'm not sure I'll use it again, even if the worms seem to love it.
The Can-O-Worms comes with one block of coir, or coconut fiber. To loosen up the coir, I soaked it in a bucket full 3/4 with water. I left the paper wrapping on the block -- paper is prime food for worms. After about 15 minutes, the coir had become a brown mass of mush. I scooped up handfuls of coir, squeezed out excess water, and spread it on the cardboard packaging on the bottom of the working tray.
Different beddings have pros and cons. Shredded newspaper is easy to obtain, holds moisture well, and doesn't have an odor, but it can also become matted and thick easily. Machine-shredded computer paper is also easy to obtain but it doesn't hold moisture as well as newspaper. Coir is apparently a byproduct of the coconut industry in Sri Lanka, and the islands started exporting it as a substitute for peat moss as a way to handle disposal. However, knowing that coir has to travel long distance (I don't have the same information about my newspaper or computer paper) and seeing the cost, I'm not sure I'll use it again, even if the worms seem to love it.
18 February 2009
Um, we're missing something
Aside from getting a vermicomposter (and there are many kinds), I also had to find worms. This is an easy task, but you need to get the right worms.
And to me, all worms look alike, right? My girls took insect investigation summer camps but although I've been a gardener for years, I don't look closely at the worms I find in my soil. Basically, there are tons of different earthworms, some of which are soil workers, and some of which are composting worms, who don't like living in soil but prefer heaps of organic matter. We love earthworms for everything they do in our soil -- especially those of us with heavy clay soil that needs an earthworm's tender aeration -- but they wouldn't do diddly in a heap of organic waste.
(Quick aside: worked on a conservation project at the Botanic Garden with a soil ecologist who told me the earthworms we so treasure in our soil aren't actually native to our country. At some point, they were brought over here, probably in an agriculture shipment as a stowaway. Who knew? Gardeners in this country act like the earthworm was always here and have a god-given right to infect our soil, blah blah -- I'm just glad they're here now.)
So I needed some composting worms -- red wigglers, redworms, stink worms or tiger worms (all referring to the very same beast). They're not something I could go outside to find. Luckily, there are worm supply farms all over the internet (you might say the internet is crawling with them, but I'm not partial to easy puns).
My supplier of choice was GardenWorms because they were one of the least expensive options with ready stock. I imagine that hunting for reg wigglers in a time other than the dead of winter might reveal more sites with stock to ship.
The worms arrived in a bag with some bedding. Usually the box will say "live" or "perishable," but our postal guy, Eric, was so freaked out by the combination of "GardenWorms" and "perishable" on my box that he rang the doorbell to hand me the package personally and to verify that I wouldn't be eating what was inside.
And to me, all worms look alike, right? My girls took insect investigation summer camps but although I've been a gardener for years, I don't look closely at the worms I find in my soil. Basically, there are tons of different earthworms, some of which are soil workers, and some of which are composting worms, who don't like living in soil but prefer heaps of organic matter. We love earthworms for everything they do in our soil -- especially those of us with heavy clay soil that needs an earthworm's tender aeration -- but they wouldn't do diddly in a heap of organic waste.
(Quick aside: worked on a conservation project at the Botanic Garden with a soil ecologist who told me the earthworms we so treasure in our soil aren't actually native to our country. At some point, they were brought over here, probably in an agriculture shipment as a stowaway. Who knew? Gardeners in this country act like the earthworm was always here and have a god-given right to infect our soil, blah blah -- I'm just glad they're here now.)

So I needed some composting worms -- red wigglers, redworms, stink worms or tiger worms (all referring to the very same beast). They're not something I could go outside to find. Luckily, there are worm supply farms all over the internet (you might say the internet is crawling with them, but I'm not partial to easy puns).
My supplier of choice was GardenWorms because they were one of the least expensive options with ready stock. I imagine that hunting for reg wigglers in a time other than the dead of winter might reveal more sites with stock to ship.

The worms arrived in a bag with some bedding. Usually the box will say "live" or "perishable," but our postal guy, Eric, was so freaked out by the combination of "GardenWorms" and "perishable" on my box that he rang the doorbell to hand me the package personally and to verify that I wouldn't be eating what was inside.
08 February 2009
Can-O-Worms

Oops, Christmas refers to this post, not the last. Being crafty in my composting marriedness, I inveigled my poor spouse to procure the bin. I sent him pictures from Amazon and my favorite composters site. He ignored me and purchased the Can-O-Worms.
The Can-O- Worms is considered to the most popular home-vermicomposting system in the US. You get a legged base with spigot, three trays, and a top. The spigot is for releasing the liquid (called leachate) that may drain from the composted organic waste -- this makes prime fertilizer for indoor plants. The Can-O-Worms is made with recycled plastic and comes packaged in cardboard that you then use in the Can -- nothing is wasted.
You can vermicompost in just about any plastic or wood container that allows aeration. Some people get Rubbermaid bins and drill holes in appropriate places -- this would be horizontal vermicomposting, since they'd be using the entire bin at the same time. With horizontal vermicomposting, there's time and mess with harvesting out the finished product, separating the worms, etc.
The Can-o-Worms is a vertical unit that supposedly makes harvesting and separating easier. Ostensibly, you start with the worms and the food in the bottom bin until it's full, then add food to the next up bin and the worms migrate up once the food is fully digested in the lower bin.
05 February 2009
Christmas
So I've enjoyed composting over the years. Perhaps more so than my family. After all, I'm the one who mostly takes out the trash, so I can tell how much less we're creating. I'm the one who is most in the kitchen, so I can tell that our trash no longer smells (unless there's uncooked meat/wrapping in the bin). I'm the one who treks out to the outdoor bin on a twice-weekly basis with an under-sink bin brimming with organic waste. And I'm the gardener who appreciates using free compost and almost-compost to fill raised beds for growing spring and summer vegetables.
But we live in Chicago; half the year (it feels like) our outdoor bin is covered in snow. Time for something new. Time to appreciate Chicago in all its cold wonderfulness and embrace the challenge of a true Chicago winter.
Time for worms.
But we live in Chicago; half the year (it feels like) our outdoor bin is covered in snow. Time for something new. Time to appreciate Chicago in all its cold wonderfulness and embrace the challenge of a true Chicago winter.
Time for worms.
01 January 2009
In the beginning...
A long time ago, I didn't like dirt, worms, gardening, noxious odors, or decaying material. I liked my carbon in paper form, neatly bound, preferably containing a beguiling story about horses and a young girl.
Then I went to law school. I had kids. I learned to appreciate the concrete world around me, not the fantasy world in a book. And then I found gardening books, and my nirvana was complete.

So the truth is I didn't set out to compost, much less compost with worms. After politely ignoring my mother's love of plants for 26 years, I began gardening in the tiny front court of our coach house off Addison, more as a way to fill the time before the beginning of law school than as a bona fide interest. A casual purchase of red salvia from a neighborhood Walgreens turned into using my brother's car during his honeymoon as a vehicle for plant purchase from farther afield. By the time I had grown my first sunflowers taller than Pete, I was hooked.
Then I went to law school. I had kids. I learned to appreciate the concrete world around me, not the fantasy world in a book. And then I found gardening books, and my nirvana was complete.

So the truth is I didn't set out to compost, much less compost with worms. After politely ignoring my mother's love of plants for 26 years, I began gardening in the tiny front court of our coach house off Addison, more as a way to fill the time before the beginning of law school than as a bona fide interest. A casual purchase of red salvia from a neighborhood Walgreens turned into using my brother's car during his honeymoon as a vehicle for plant purchase from farther afield. By the time I had grown my first sunflowers taller than Pete, I was hooked.
Subscribe to:
Posts (Atom)


 Posts
Posts

